Does a $130 coffee grinder make better-tasting coffee than a $16 coffee grinder?
Short Answer: No, they both produce good-tasting coffee.
Long Answer: The grinder is just one aspect out of many that contribute to the quality of the finished cup of coffee.
Things I learned while performing this side-by-side comparison:
The Comandante-style grinder took 41 seconds to grind 21 grams of coffee beans and the Hario-style grinder took twice as long (90 seconds) to grind 21 grams of coffee beans.
Both grinders produced grounds that appeared similar BUT the grounds from the Hario-style coffee grinder took 45 seconds longer to finish brewing, compared to the Comadante-style grinder.
The finished cup of coffee from both grinders tasted great, despite the differences I listed above.
Does this mean that that your coffee will taste good regardless of the coffee grinder you use?
Maybe.
In my specific case, it’s likely that since both coffee cups were made using identical beans, identical brewing methods, and identical amounts of filtered water, the resulting coffee cups were largely identical.
Controlling variables in your coffee-brewing process is the best way to ensure a quality cup of coffee, morning after morning.
There was a time where my coffee-making process was highly disorganized and I would never be able to pour the same cup of coffee twice.
I wish to think James Hoffmann for his series of coffee-related YouTube videos; thanks to James’ videos, I’ve learned a great deal about how to make a consistently-good cup of coffee.
If you read all the way to the bottom of this blog post, it’s likely that you will also like James Hoffmann’s videos.
If you’re still reading all the way to the bottom of this blog post, then maybe it’s because you’re looking for links to the specific grinders I used.
Here are my Amazon Affiliate links to the grinders.
If you click the links I’ve included, I may receive a percentage of the sale.
If you prefer to avoid Amazon, try searching for “Hario-Style Coffee Grinder” or “Comandante-Style Coffee Grinder”.
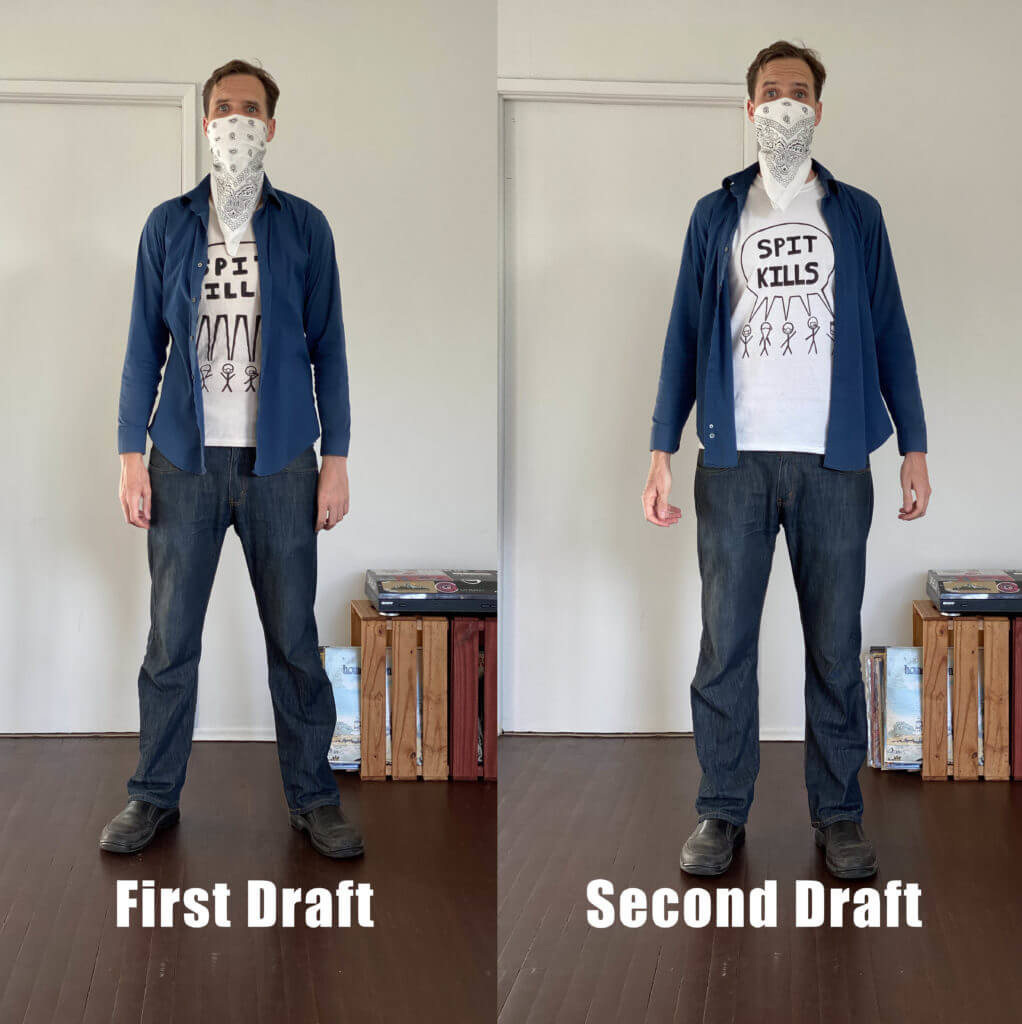
I got a fabric marker and a white T-shirt from the art store.
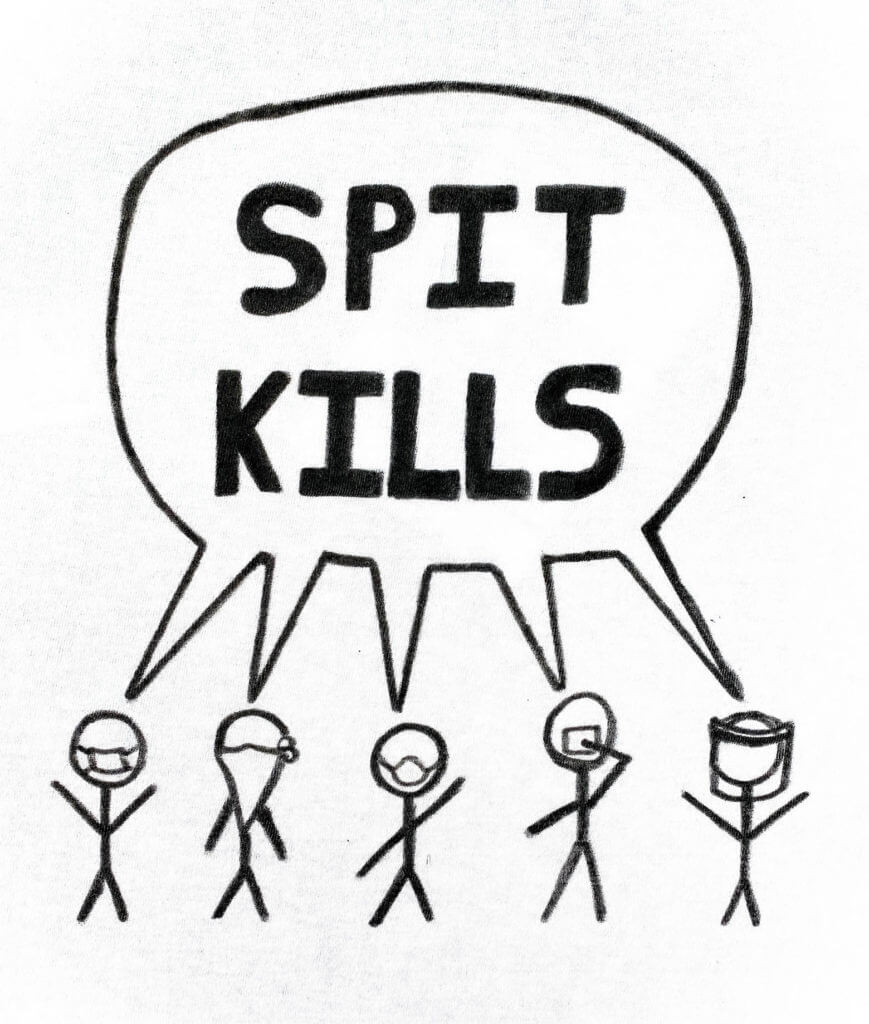
My intent was to make a T-shirt with the slogan “Spit Kills”.
The resulting shirt is satisfactory, hence this blog post.
“Spit Kills” slogan with stick figures
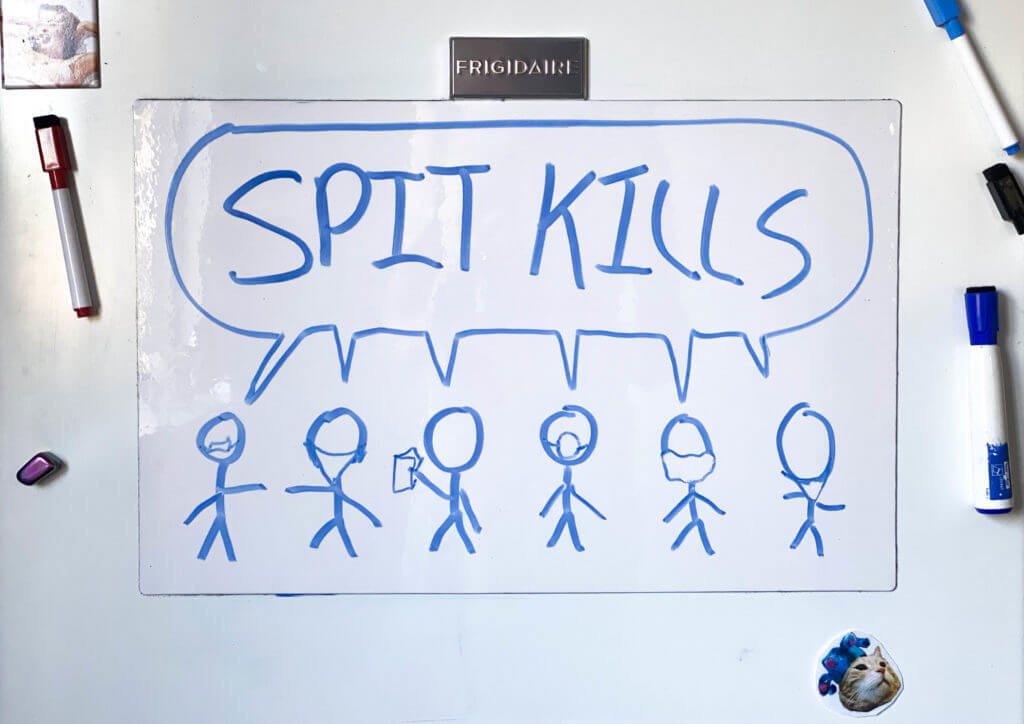
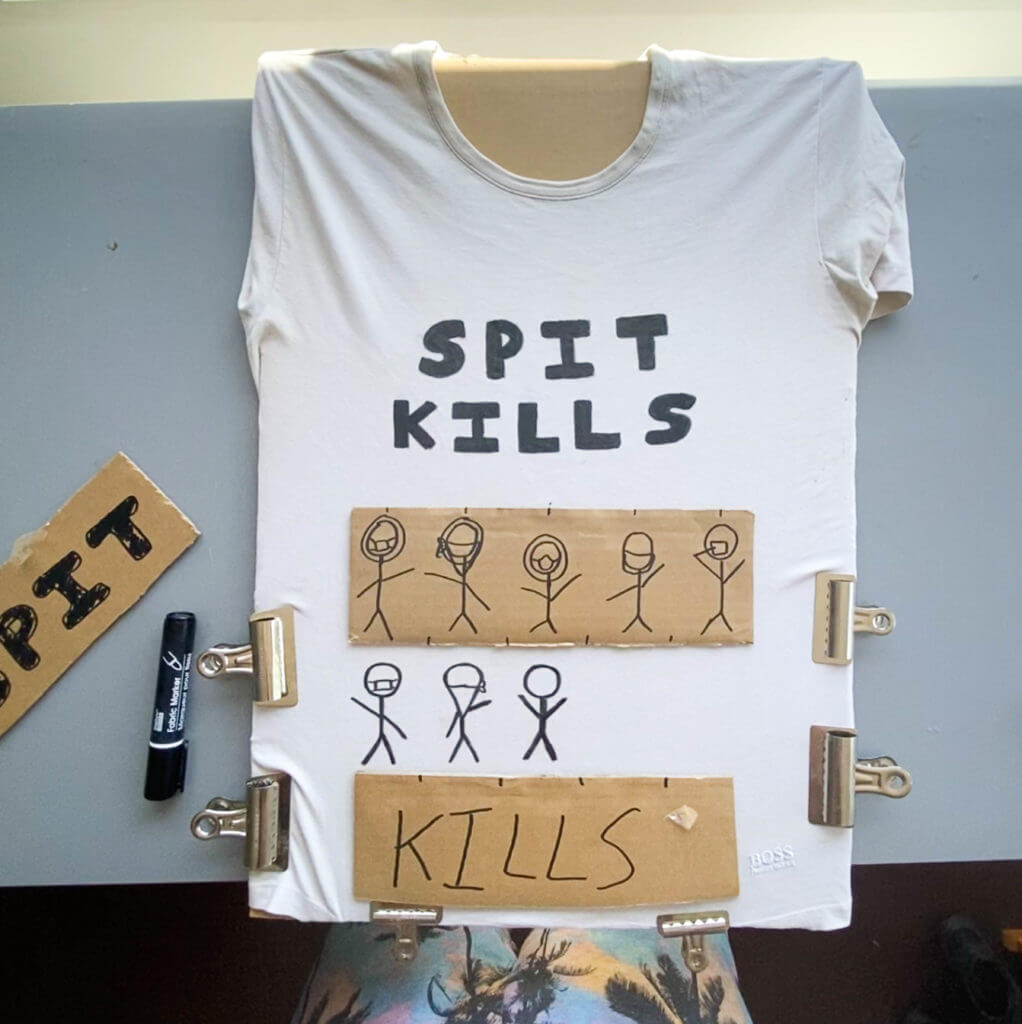
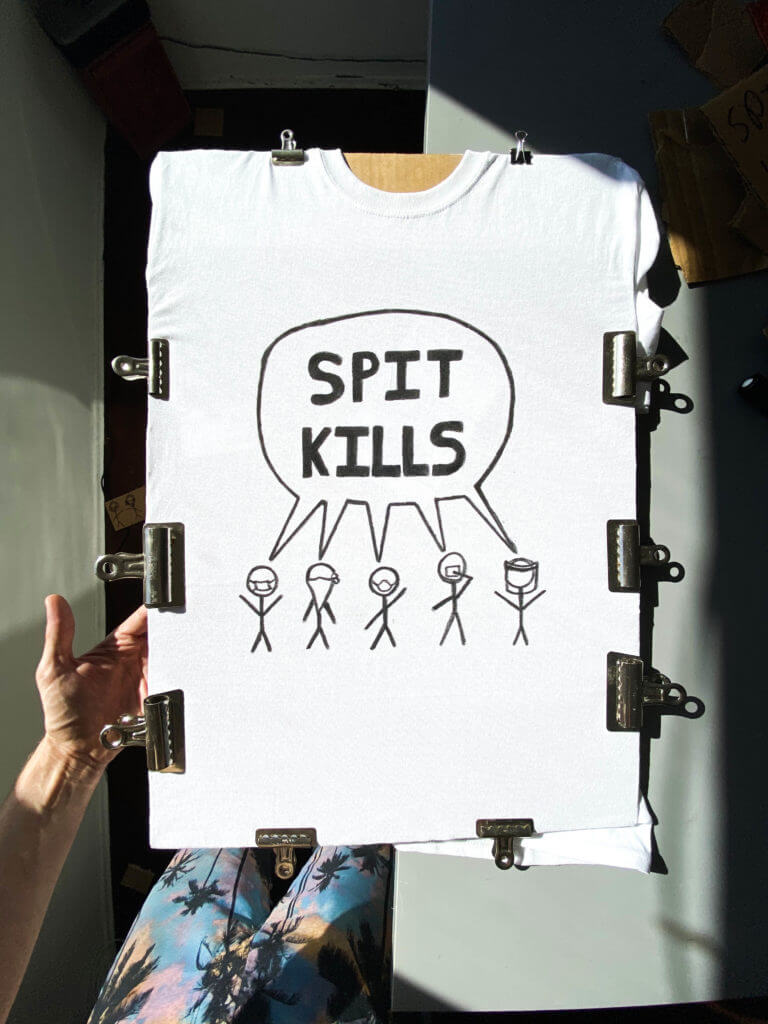
Sketch Draft, as shown on the Rapid-Prototype Board (Dry-Erase Board)Using scrap cardboard to visualize the text layout & size on the First Draft shirt.Finished Second Draft T-shirt, with binder clips to prevent the shirt from bunching while I drew on it.Showing the First Draft and the Second Draft. I like the Second Draft better, for a lot of reasons. Same comparison, but with a button-up shirt over it. I definitely like the Second Draft better.
This experiment tests how much bacteria remains on face-covering fabric bandanas that are soaked in an iodized salt-water solution, compared to bandanas that are not soaked in an iodized salt-water solution.
Experiment Origin:
This experiment is inspired by a scientific study published by Nature, in 2017.
The Nature article explains testing done on fabric face masks that were soaked in a salt solution, with intent to reduce viral transmission in face masks.
I am an amateur scientist and I do not have the ability to test for viral transmission of my salt-bandana face coverings.
While I can not test for viruses at home, I can test for bacteria on my homemade salt-bandana face covers.
Process:
– Five clean bandanas are soaked for 60 minutes in a 1:4 salt-water solution
– Allow the five salt-soaked bandanas to air dry
– Wear each individual bandana as a protective face covering while doing everyday tasks
– The five salt-soaked bandanas are then swabbed with sterile cotton
– Salt-soaked bandana swabs are brushed on agar in petri dishes
– Petri dishes are left in an 80 degree F kitchen cabinet for 72 hours
– Results are then observed and cataloged
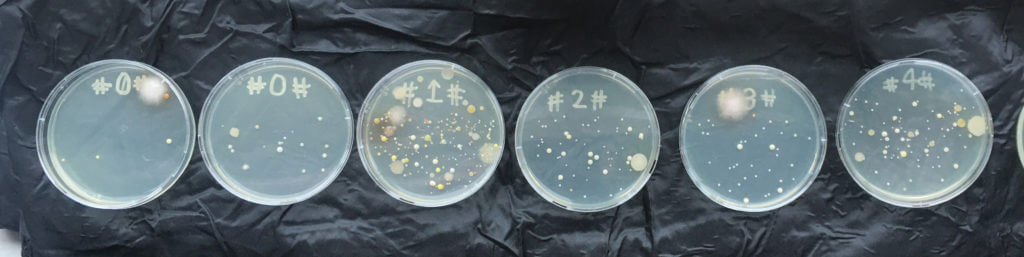
Results:
Petri dishes containing the result of the salt-bandana experiment, 72 hours after being swabbed.
All five salt-soaked bandanas show evidence of bacteria in their petri dishes
All five petri dishes showed evidence of small white, yellow, and red circular blobs
Three of the five petri dishes showed evidence of white fuzz
Conclusions:
No definitive conclusions can be drawn from this experiment, due to the relatively-small sample size.
Next Time:
-Collect larger sample size (30 bandanas instead of 5)
-Wear the bandanas in a variety of different environments (beach, park, restaurant)
-Wear the bandanas in different weather conditions (sun, fog, mist)
-Wear salt-soaked bandanas while driving (windows down, air conditioning on)
-Ask friends to wear salt-soaked bandanas and return them for swabbing
Yesterday, I did my work from home on an Internet-connected computer.
Before I began my work yesterday, I enabled the “Screen Record” function of the computer’s Quicktime app.
I took the resulting 1-hour-and-9-minute screen recording and sped it up, resulting in a 30 second video.
So, that was a fun experiment in recording myself as I do various visual-computing tasks.
Today, I began more work of a similar nature.
Almost immediately, I was distracted by trying to find the right YouTube video to play in the background while I work.
I decided on Spotify and then did some more photoshop work.
I then got the idea to record my screen again, because I realized I was being kept honest by the idea of observation via screen recording.
I was being kept honest and on-task because I knew I’d eventually have to review my own actions when I reviewed the screen-recording video.
If I dawdled while I worked, that would mean a longer screen-recording video would be recorded, and that would mean more future work for me, to have to edit the footage later.
The point is:
Start recording yourself while working.
See what happens. 🙂
P.S. Immediately before posting this, I had turned on Quicktime’s “Screen Recording” feature.
I intended to post the screen-recording video of my writing this post, at the end of this post.
Turns out I hadn’t turned on the screen-recording feature after all.